November 28, 2014

Happy Black Friday!

Were you one of the folks waiting in line for stores to open or were you out in the middle of the night? I will admit that after working in the retail industry for 10 years, I stay as far away from stores as I can on most days and definitely on Black Friday! If you are one of the folks who were out, I hope your adventures were fun and filled with savings.


Screen Shot 2014-11-23 at 6.35.40 AM

STAMPIN' UP! ONLINE EXTRAVAGANZA SALE!
Sale runs through December 2nd
Selected product discounted up to 50%!
Click on the graphic to see all the deals


Ornamental Pine

The week has been so full of stamping news that I've not shown you all of the Ornamental Pine samples I made, be not dismayed, I'll share before the new week begins!

Place this card in an envelope and it's like sending the outdoors! When perusing Pinterest, this layout caught my eye. I stamped the pine branch in Mossy Meadow and colored the branch itself with a Chocolate Chip marker. I stamped it a second time without reinking. I like the clean Whisper White base layered onto Cherry Cobbler. The vintage ticket corner punch added character to my layers and the sentiment layered over a bit of 1" Cherry Cobbler Sheer Ribbon is the perfect ending!


Another CASE card. Pool Party, Chocolate Chip and Mossy Meadow come together beautifully in this card. I used Soft Suede ink on the Hardwood stamp and stamped it off before placing my 4 x 5.25 piece of Pool Party on to the Hardwood stamp. I covered it with a piece of scrap paper and applied pressure with my hand to transfer the pattern to the CS. This is typically the technique I use with background stamps to assure even application of the ink. The Square Framelits were used to create the window. On the inside layer I used the masking technique to create a snow bank and sponged the sky with Pool Party. From there I stamped the Ornamental Pine in Mossy Meadow and added the pine cones. The sentiment was stamped with Soft Suede. This card makes me think of looking out of our north woods cabin window - so peaceful!

Hope you enjoyed today's samples. If you have any questions, always know I'm here to help. Until next time, take gentle care.

November 27, 2014

Happy Thanksgiving!


Today is a US national holiday, a day to count our blessings. May your blessings be many and your holiday celebration happy!


Important Topics
    
**  The online Extravaganza continues! Click here to view all sale products on sale now through December 2nd.

.
**  Give the gift of creativity with Paper Pumpkin! Click here for more information.

**  Join Stampin' Up! and receive $125 in product for only $75! Click here for details.


PPA Challenge


Another fun sketch this week. I chose to create a card that could be used for a masucline birthday. I chose the Park Lane DSP with an angular pattern that complements the points on the stars. I pulled Old Olive, Blackberry Bliss and Daffodil Delight colors from the pattern to create my stars. A simple sentiment finished it off. Fun sketch! Be sure to play along.

Something to end this post with a smile. My amazing aunt Laurie passed on this summer at the age of 96. She had no children of her own and exposed me and my siblings to countless experiences and showered us with love and the finest material gifts. I was at my sister's home yesterday and we were going through some of my aunt's photos. Here is a classic Throw Back Thursday. My high school graduation photo taken at age 17 long before I ever wore make up and a glamour shot I had done when I was 30. I can't be objective on this one, would you recognize these two photos as being of the same person? We do change with time!


Thanks for stopping in and have a wonderful Thanksgiving day!


November 26, 2014

Early Morning and Weekly Deals


Greetings!

Early morning? more like the middle of the night. I'm writing this at 3:30 am. I just returned from delivering my son to school. He is in the first group out of three that are heading to California today; his marching band will be playing at Disney and in the Hollywood Christmas parade! If you watch the parade, either live or on TV, look for the Slinger, WI High School Marching Band; they look very sharp in their red, white and blue uniforms - and they sound great too!


In addition to the amazing sales at the Online Extravaganza, SU! also has some great weekly deals! Embossing folders add texture and beauty to your cards. Do you find making masucline cards a challenge? You want it to look great, but how do you jazz it up without making it look "girly"? The Argyle embossing folder - to the rescue! The Fancy Fan folder is a great one to use for baby cards; it has a cloud effect that's soft and sweet for baby. Just in time for the holiday season, add a little sparkle with Dazzling Details. It's easy to apply just where you want it! To purchase any of these items click here or on the photo below.


Would you LOVE to receive $125 in product for only $75? 
Join my team of Stamping Mates! Find details here.

Give that special someone the perfect gift of Paper Pumpkin.
Click here for details!

Ornamental Pine
There are oh so many possibilities with this set. Here is another one:


Cherry Cobbler, Brushed Gold and Mossy Meadow come together in a rich seasonal greeting. I used markers to color the pine bough stamp in order to get the brown branch and green pine needles. If you're careful, you can achieve this same look using stamp pads. The pinecones were stamped over the top. I like the look of a larger Cherry Cobble border on this card.

This was one of the samples made for a business order which is why you see a vintage SU! greeting.

It's now shortly after 4 am, I think I'm headed back to bed for a few more winks. Thanks for stopping and until next time, take gentle care.


November 25, 2014

Extravaganza, PPA Challenge and a HUGE project completed

Hi all,

Yipes, what a day I had yesterday. My son had a MD appointment 30 miles from home and the rain turned to snow as we were leaving. Getting there wasn't so bad, but coming home, my windshield wipers were collecting ice and I couldn't see. As luck would have it, at one point we had to stop to wait for a train and I had time to pop out of the car and de-ice. Driving in the stuff wasn't bad, but not being able to see was a bit of a challenge. Guess I need to get to the auto supply store for some new winter wipers!

Now, on to the stamping news!


Screen Shot 2014-11-23 at 6.35.40 AM

STAMPIN' UP! ONLINE EXTRAVAGANZA SALE!
Sale runs through December 2nd
Selected product discounted up to 50%!

I hope you were able to take advantage of the door buster deals yesterday. If not, there are LOTS more deals to had. Click on the photo above for a listing of all sale products! Fill in your Wish List and then click here to complete your shopping!


LOOKING FOR THE PERFECT GIFT?

Prepaid Subscriptions

12-month Prepaid Paper Pumpkin Subscription
12-MONTH PREPAID PAPER PUMPKIN SUBSCRIPTION
Price$215.40
1-month Prepaid Paper Pumpkin Subscription
1-MONTH PREPAID PAPER PUMPKIN SUBSCRIPTION
Price$19.95
3-month Prepaid Paper Pumpkin Subscription
3-MONTH PREPAID PAPER PUMPKIN SUBSCRIPTION
Price$59.85
6-month Prepaid Paper Pumpkin Subscription
6-MONTH PREPAID PAPER PUMPKIN SUBSCRIPTION
Price$113.70

Want to get 6 months of Paper Pumpkin for FREE?

Join my Stamping Mates and for $75 you can choose $125 in product, including the Paper Pumpkin! Click here for more details.

Wow! Lots going on in the stamping world! 

HUGE Project Completed!

My stamping world has revolved around completing a holiday card order and yesterday the 200 cards were delivered (in the snow). I included a goodie bag of items made for my vendor fair. Before heading out on my delivery, I made a quick tea light lantern using our vellum card stock embossed with snowflakes to add to the bag. I had one working tea light left in my stash and found, when I turned it on, that it changes colors - how fun! I was in such a rush to get out the door that I didn't get a photo of it - boo! Here are my cards, ready to go. 400 stamped trees, 600 punched trees, 1,000 rhinestones, 200 bows, 200 fussy cut cardinals and I don't have any idea how many Dimensionals. You're likely thinking, "Is this woman crazy?". I make these for a friend of mine and this year let him shop on my Pinterest page. Next year I need to limit the choices! They were fun to make and as I'm not working right now the project was doable.


PPA Challenge

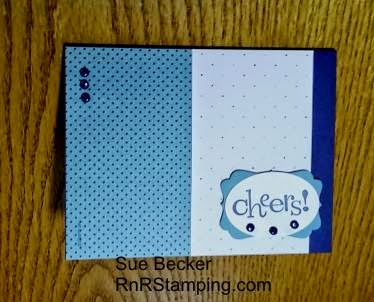
One other project I managed to sneak in was the PPA challenge for this week. This is a quick, easy layout that came together in a snap using Flowerpot DSP. I cropped the sentiment from Happy Hour with the Decorative Label punch, added a few candy dots and I was good to go!


Goodness, so much going on. I also started working on my Christmas cards; I'm using the Ornamental Pine set and CASEd a beautiful card that I'll share with you when it's completed.

Thanks for sticking with me through this long post. 

November 24, 2014

ONLINE EXTRAVAGANZA!

GET HOT DEALS!! TODAY THROUGH DEC 2nd!

WOO-HOO! It's here! The online extravaganza has begun.

Door Busters - TODAY ONLY!

Various Select Textured Impressions Embossing Folders - shop now
     $5 Each
***Excludes Stylish Stripes, Chevron, Beautifully Baroque & Woodgrain
Embossing folders add texture and depth to your projects. Did you know you can ink them and use them as stamps too? Today's the day to purchase all of your favorites!

Gift Box Punch Board (135863) - shop now
     30% OFF - only $13.96!! 
Make your own boxes in dozens of sizes. It's quick, easy and oh, so much fun!

Card Kit Bundles - shop now
     30% OFF - now just $34.93
Everyday Occasions Cardmaking Kit (134797)
Hip Hip Hooray Cardmaking Kit  (134998)
Each kit comes with everything you need to make 20 unique and wonderful cards! 

For complete list of sale items, click here

Need a Wish List? click here

Is your order more than $75? Click here to learn how to add $50 in FREE merchandise to your order!

Don't miss out on any SU! news! Be sure to subscribe to my blog by entering your email address in the column on the right.

Throughout this week, I'll be featuring samples using the Ornamental Pine stamp set. If you look at my blog header, you'll see that I'm a bit partial to pine trees and pinecones. Needless to say, this is my favorite stamp set from the holiday catalog and one I'll use all year round! I've had lots of fun creating with the set and look forward to sharing with you.

Thanks for stopping. Please let me know if you have any questions; I'm here to help in any way I can.

Until next time, take gentle care,


November 22, 2014

Holiday On-line Extravaganza!

BREAKING NEWS!!

THE STAMPIN' UP ON-LINE EXTRAVAGANZA SALE STARTS THIS MONDAY!!!
Preview sale items HERE and fill your WISH LIST ! Up to 50% off on many items and Monday doorbuster specials. The sale runs from Monday, November 24 - Tuesday, December 2. 

GET $125 FOR $75! So you made your list, you checked it twice and you want everything! From November 24 - December 2, the Stampin' Up! Starter Kit will be 25% off. Receive over $50 in FREE product plus FREE shipping! No risk, no penalty! Here are the details:

Take your passion for paper, stamps and SAVINGS to a new level!
  • For a limited time!  Sale runs one week only!  Nov. 24 - Dec. 2.
  • 25% off!  $99 Starter Kit will be discounted 25% to $74.25.  You can order it through me HERE!
  • You decide!  Choose up to $125 in product for your kit.  That’s over $50 in FREE product!!!
  • F to ree Shipping!  The kit ships FREE for another 10% savings.
  • Stock up!  Once you join, you receive a one-time 30% off discount on a product order of $150 or more placed within 45 days.
  • 20% discount!  Enjoy a minimum of a 20% demonstrator discount every day.  
  • 5% Bonus EXCLUSIVELY this special!  Receive 5% cash back on all purchases and outside sales placed in December.  Cash back is in addition to your discounts and will be paid in January.
  • Be first!  December marks your chance (with your demonstrator status) to see and pre-order products from the NEW Occasions Catalog and earn Sale-A-Bration gifts (also new)!
  • No risk!  You’ll have through April 30, 2015 to “test drive” demonstrator discounts and benefits.  
  • No penalty!  If you reach $300 in sales by the end of the first FULL quarter, you will renew your demonstrator benefits for another quarter. If you don’t reach $300 in sales (frankly, you don’t need to spend another dime), you “drop” with no penalty.
  • No catch!  There’s no catch--no need to host workshops, purchase anything further or get outside sales.  
THE BEST NEWS OF ALL!  I welcome hobby stampers!  The majority of people purchased their Starter Kit and joined for the discounts.  However, they stay because of the exclusive resources available, fun and friendships.
If you have any questions, feel free to contact me. I'd love you to join my team of stamping mates!
Happy shopping!


Wondrous Wreath Day #6

Today's post showcases the last of my Wondrous Wreath card samples and is my favorite.


This card features Brush Gold and Naturals White CS. The first layer of the wreath uses Smokey Slate ink, followed by embossed silver and topped with embossed gold berries, wreath and greeting. I love the rich look of this card. This photo shows a note card size, but you could mount this on a piece of 8.5 x 5.5 CS to bring it to an A2 size.

I hope you've enjoyed the samples provided this week. Next week I'll be showcasing the Ornamental Pine set, so be sure to stop back.

Want to be sure you see all of the samples next week? Subscribe to my blog by entering your email address in the field in the right column and it will come to you automatically.

Hope you enjoy the sample. Let me know if you have questions and be sure to stop back next week for Ornamental Pine samples.

Until next time, take gentle care,
Sue


To purchase any of the items used in this project, click here to access my online store.

November 21, 2014

Wondrous Wreath Day #5

So, have you tried to create samples of your own using this stamp set? My hope is you'll find inspiration in one or more of the samples I'm sharing this week.

I again chose traditional Christmas colors in this card. The Wonderful Wreath Framelits include not only the wreath, bow and words, but a door hanger too. The Stylish Stripes embossing folder makes a great background for this project. The sentiment is included in the Wondrous Wreath set along with a great sentiment for use inside your card. When using wreaths on your project, a must have is Dimensionals to lift your beautiful wreath off the page.


Want to be sure you see all of my samples? Subscribe to my blog by entering your email address in the field in the right column and it will come to you automatically.

Hope you enjoy the sample. Let me know if you have questions and be sure to stop back tomorrow for my last Wondrous Wreath.

Until next time, take gentle care,
Sue


To purchase any of the items used in this project, click here to access my online store.

November 20, 2014

Blog Candy Winner

Just a quick post coming from my phone...the Internet has been down at my house for 2 days. I don't know what is going on; I am not a techie but I'll figure it out.

Thanks to those who left a comment on my 100th blog. The winner of the blog candy is Vickie! Vickie, please send me your address via email and I'll send off your treats.

I'm off to figure out my lack of Internet connection. Thanks for stopping and be sure to stop back tomorrow for another Wondrous Wreath sample.

Wondrous Wreath Day #4


Thanks for all who celebrated my 100th post yesterday. I will continue to work on bringing you fun and useful information to use in your paper crafting!

Today is another sample using the Hardwood stamp. This is another very versatile stamp - the possibilities are endless!  Early Espresso in on Cherry Cobbler CS provides a barn door effect for today's Wondrous Wreath. I accented with Brushed Gold CS and a dot of rhinestone bling - I thought it worked well against the rugged barn board.


Want to be sure you see all of the samples this week? Subscribe to my blog by entering your email address in the field in the right column and it will come to you automatically.

Hope you enjoy the sample. Let me know if you have questions and be sure to stop back tomorrow for another Wondrous project.

Take gentle care,
Sue


To purchase any of the items used in this project, click here to access my online store.


November 19, 2014

Wondrous Wreath Day 3

When making my sample cards with the Wondrous Wreath bundle, it was difficult to limit the choices. I am a bit of a Pinterest junkie and there are so many great ideas out there.


This card is a variation on the one I showed you on Monday. It gives you a bit more room on the inside to write your message. I love this fold; it provides a wow factor all on its own! The tiny frame of Garden Green is just what is needed to give the card front a finished look.

Want to be sure you see all of the samples this week? Subscribe to my blog by entering your email address in the field in the right column and it will come to you automatically.

Check out this week's deals:
     Click on the description to go to my online store to purchase any of these great deals.

1 Square Punch
1" SQUARE PUNCH 
1/4 Handheld Punch by Stampin' Up!
1/4" CIRCLE HANDHELD PUNCH 
Autumn Spice Digital Kit -- Digital Download
AUTUMN SPICE DIGITAL KIT - DIGITAL DOWNLOAD 
Clear Oval Accent Bigz Die
CLEAR OVAL ACCENT BIGZ DIE 
Deco Labels Framelits Die
DECO LABELS FRAMELITS DIE 
Early Espresso Cut & Ready Card Bases by Stampin' Up!
EARLY ESPRESSO CUT & READY CARD BASES 
Silver Basic Metal Buttons
SILVER BASIC METAL BUTTONS 
Smoky Slate Stampin' Emboss Powder
SMOKY SLATE STAMPIN' EMBOSS POWDER 


Hope you enjoy the sample. Let me know if you have questions and be sure to stop back tomorrow for another Wondrous project.

Take gentle care,
Sue


To purchase any of the items used in this project, click here to access my online store.


November 18, 2014

Wondrous Wreath #2/100th Blog Post!

Welcome to day 2 of my Wondrous Wreath samples. 

As I was setting up this post for publishing, I realized that it's my 100th post! I think that's cause for celebration and some blog candyLeave a comment at the end of today's post and one lucky person will receive a surprise package filled with SU! goodies!

Back to our sample. Today's sample is more of a country look. It's also a bit different in that I used the Framelit and not the stamp, set. After die cutting the wreath, I ran it through the Big Shot with an embossing folder (retired, but the Beautifully Baroque would be perfect) to give it texture.


The base of this card is Soft Suede. I used Soft Suede ink on the Hardwood stamp and stamped it on Very Vanilla CS. I like the small frame of Real Red, it really provides a pop. The sentiments that are part of the Wonderful Wreath Framelits set are so much fun to work with. For ease in removing the words from the die cut, when making your Big Shot sandwich, lay down your acrylic plate, card stock, a piece of wax paper and lastly the framelit. You'll find your words will pop out of the die very easily. The holly berries were punched from Real Red CS with my 1/16" circle punch. Dimensionals were used to give the wreath some depth.

This was a fun card to make and would be easy to reproduce.

Want to be sure you see all of the samples this week? Subscribe to my blog by entering your email address in the field in the right column and it will come to you automatically.

Hope you enjoy the sample. Let me know if you have questions and be sure to stop back tomorrow for another Wondrous project.

Take gentle care,
Sue


To purchase any of the items used in this project, click here to access my online store.


November 17, 2014

Wondrous Wreath Week

 Welcome to a week of Wondrous Wreath!

For the past 5 or 6 years, I've made holiday cards for a friend of mine who owns a business. He usually places an order for 200 cards. This year, after unpacking all of my fabulous stamp sets, I went a little nuts on making samples. He didn't choose a card using the Wondrous Wreath set and I want to share my efforts, so here's Monday's wreath.


Along with the Wondrous Wreath bundle, I used the Good Greetings and Holiday Invitation stamp sets along with the Stylish Stripes embossing folder. If you look closely at the bow, you'll see some sparkle that was added by stamping Heat and Stick powder and topping it off with Dazzling Diamonds. To achieve the peek-a-boo look to the sentiment, I have to thank France Martin for her tutorial.

Want to be sure you see all of the samples this week? Subscribe to my blog by entering your email address in the field in the right column and it will come to you automatically.

Hope you enjoy the sample. Let me know if you have questions and be sure to stop back tomorrow for another Wondrous project.

Take gentle care,
Sue

To purchase any of the items used in this project, click here to access my online store.


November 16, 2014

Wondrous Wreath

This week I'll be featuring samples using the Wondrous Wreath bundle. As I've perused ideas to CASE, I've found that this set will be a winner in every season!  


If you're still looking for inspiration for your holiday greeting card, tune in each day this week for ideas.

To make sure you don't miss any of the ideas, subscribe to my blog by entering your email address in the right bar of the blog and get the post emailed directly to you!

If you've not yet purchased this bundle, click on the photo to access my 24/7 online store. 

Thanks for stopping!


November 15, 2014

Mini Coffee Cup Holder


Hi all and thank you for joining me today! 

Special thanks to the gracious and generous Mary Fish for sharing her blog and allowing me to show you a quick and easy tutorial to hold your mini coffee cups.

You've seen these little guys all over Pinterest and crafting blogs. The cups and lids can be purchased at www.webstaurantstore.com. Gather your friends, pool your resources and order in bulk! To cover your cup there are templates out there for you to copy, but I found it easiest to dismantle one of the cups and make a pattern from that. I did use DSP from my paper stacks and found that there was a small spot that wasn't covered due to the measurement of the paper stack.


I simply used the leftover scrap to cut a 1/4" wide piece of matching DSP, adhered it over the seam using my Tombow glue and trimmed it to match the length of the wrapper.


In preparing for seasonal craft fairs, I was looking for a way to package my little minis that wouldn't take a lot of time or resources. I sat with my steaming cup of coffee looking at the mini cup contemplating my stamping stash and came up with an idea that needs basic tools, card stock, your Scalloped Tag Topper punch and embellishments!


Your first step is to pull out your Stampin' Trimmer and your card stock of choice. You will need 2 pieces of 2" x 7 1/2" CS. When cutting card stock for use with the Scalloped Tag Topper punch, I like to line it up just to the inside of the 2" mark. The CS will slip easily into the punch and you'll have no need for a 2nd cut.

The extended arm on the Stampin' Trimmer includes measurements up to 14 1/2" and is designed to provide stability when cutting. It's not only a cutting tool, but also includes a scoring blade. 

This is a definite must have tool for every stamper!


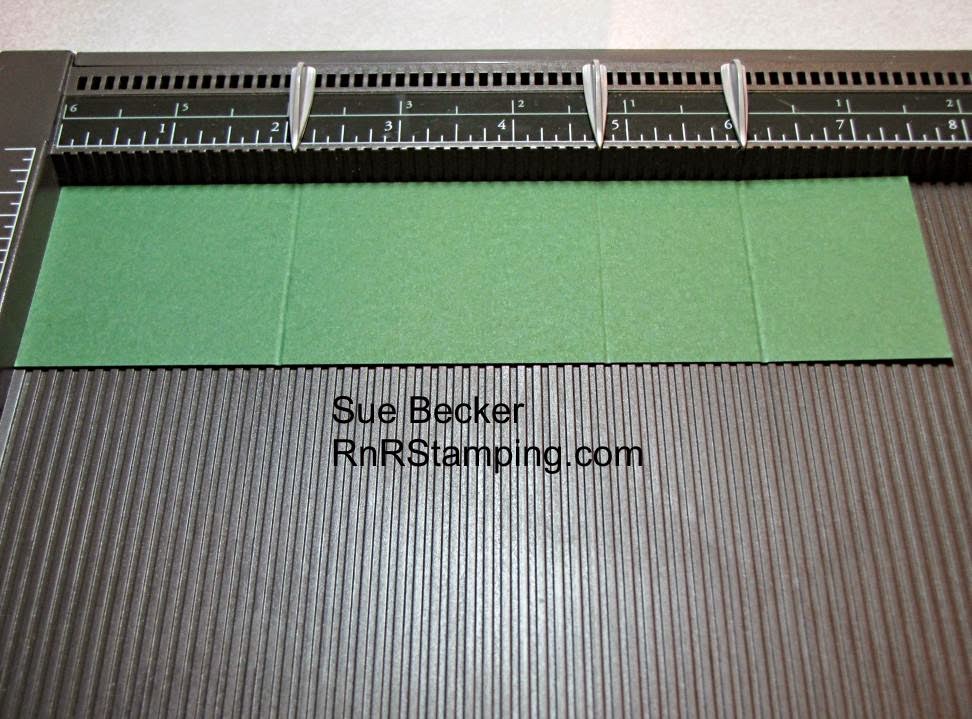
Your next step is to pull out your Simply Scored Tool. You'll score both pieces at

2 1/8", 4 3/4" and 6"


Using your Scalloped Tag Topper punch, slide the end of CS that has the smaller of the two squares into the punch


 Punch both pieces.


Once your pieces are punched, fold on the score lines so your pieces look like this.


Add adhesive of choice, I used snail here, to the un-punched end of one of the pieces of CS.


Adhere the two pieces together. It's as simple as that!!


Now all that's left to do is to embellish your project and your imagination is your only limit! You can see in the photo below that I embossed some of the holders.

I did add a small spot of snail right under the opening for the ribbon to adhere the tag tops together to better secure the cup.

I filled the cups with Hershey kisses and some of the them with Coffee Nips.


These were a big hit at my vendor event last week. They make a great little gift that is fast, easy and pretty darn cute if I have to say so myself!

So, what do you think? Please leave a comment at the end of this post. I'll look forward to answering your questions and reading your comments.


Thanks so much for stopping and until next time, take gentle care,


To purchase any products used in this tutorial, click here.