November 30, 2016

Serene Scenery Magnetic Board Gift Set

It's the November Bonus Project* !!

Michelle Wecksler is the creator of this Magnetic Gift Board Set.

A simple sheet of steel can easily be transformed into a beautiful two-sided magnetic board for hanging your pictures and keepsakes!  This Serene Scenery Magnetic Board Gift Set includes a two-sided magnetic board, decorative magnetic photo pockets and a coordinating gift tag. Find out how to go from hardware store to home décor in this fun tutorial!


*Bonus projects can be obtained by subscribing to two or more months in a row, putting the Craft Project Central badge on their blog, or by referring a friend and when they subscribe, letting us know.  To subscibe, click here.

Enjoy!


Sue


November 29, 2016

Sending Love Sneak Peak

Hi all,

I have an Occasions Catalog sneak peak for you today! The Sending Love Suite is a must have for Valentine's Day, anniversaries and little love notes throughout the year. The Sealed With Love stamp set and Love Notes Framelits Dies will be available as a bundle, which means savings for you!

The Craft Project Central #65 sketch was used to design this card.


Another product from the Sending Love Suite is the Sending Love Designer Series Paper Stack. I LOVE paper stacks! 48 sheets; 6 each of 8 double sided designs cut 6" x 6", all for only $10!!


Is that sweet little envelope too cute or what? There's another teeny square envelope framelit and sweet stamped images that fit perfectly inside. If you don't have a demonstrator, email me and I'll be sure to get an Occasions catalog sent off to you!

Enjoy your day. Thanks much for visiting!

Sue


Dragonfly Dreams

Hi all,

I enjoyed being a part of Craft Project Central this month. Creating a project for the CPC Card Challenge was certainly less stressful than creating my tutorial!

Come and play CPC#25!


I am loving Dragonfly Dreams and pulled it out again for this challenge.


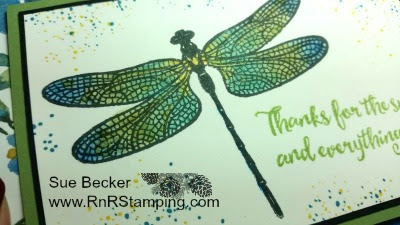
I used a combination of Rich Razzleberry and Melon Mambo. The background is a piece of Inside The Lines Designer Series Paper from the upcoming Sale-A-Bration mini catalog. I had fun coloring with the new Watercolor Pencils. You'll be able to purchase them from the Occasions Catalog on January 4th. You're going to love them! 

I cropped the main image with the Detailed Dragonfly Thinlits. I used another of the Thinlits to crop a detailed dragonfly from Vellum Cardstock. It looks like a shadow - fun!


I added Wink of Stella on my dragonflies; it adds the perfect sparkle. The sentiment is from Dragonfly Dreams.

Hope you enjoyed this card. I'm liking the funky color combo. What's your favorite color combo? Leave a comment below. I'll choose one random comment and will send the recipient a package of Pearl Basic Jewels. 

Have a great Tuesday!

Sue


November 27, 2016

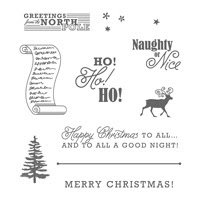
Ho! Ho! Ho! Santa Greetings

Greetings all!

Today I have a Craft Project Central sneak peak from Sue Plote.

Children love to write a letter to Santa…and to get one in return!  The Greetings from Santa Stamp Set and Detailed Santa Thinlits Dies make it easy and fun to get a letter out to Santa and to get one back…and the Candy Cane Lane Designer Series Papers and Washi Tape are just the ticket to make this project adorable…and Santa approved!


If you would like to see the complete project, and learn how to make it, you'll want to subscribe for the month of November. With your subscription, you'll get illustrated, step-by-step instructions for 10 wonderful projects for only $10! You can find out how to gain access to a bonus eleventh project over at Craft Project Central.

Enjoy!

Sue

November 24, 2016

Christmas Fireplace Box and Card Set

Hi all,

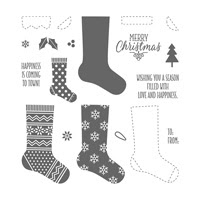
Need a festive, handmade Christmas Gift for someone special? Well, here it is! This card set features the Hang Your Stocking Bundle and the Warmth & Cheer Designer Series Paper Stack. The box is a warm and cozy fireplace with Christmas stockings hanging from the mantle. There are also three different, coordinating Christmas card designs. Make two of each design to fill the fireplace box. This project would also make a great Christmas card class.  


Christy Fulk is today's guest designer at Craft Project Central. You can have the tutorial for Christy's project and nine others by subscribing to the November projects. Visit Christy at her blog, www.createwithchristy.blogspot.com.

Thanks for stopping. Until next time, take gentle care,

Sue

November 22, 2016

Be Merry Banner Gift Set!

Amanda Corbet has a fabulous gift set tutorial for you as part of Craft Project Central's November subscription. Click here to check out Amanda's other creations. Here's Amanda's sneak peak!

Deck your halls in a non-traditional style with this pretty banner. The flecks of gold are sure to add sparkle to this simple décor piece. Are red and green more your cup of tea? Easily switch out the colors to make a banner fit for your mantle. Looking for an easy holiday gift? Package up this beautiful banner in the matching box and present it as a gift with the coordinating card. This would make an excellent class project or hostess gift!


The rich gold accents throughout this project are stunning. Be sure to check it out at Craft Project Central.

Today is the last day you can win a FREE Craft Project Central (CPC) subscription by leaving a comment on my November 10th CPC post. I'd love to hear from you!

Until next time, take gentle care,

Sue

November 20, 2016

Don't Miss the Online Extravaganza!

Make an online purchase from me this week and receive FREE gift from me!

Be sure to check out today's 24 hour flash sale!!


November 19, 2016

Christmas Cookie Cutter Tags and Matching Gift Box


Hi all,

Craft Project Central's guest designer, Pat Tecza has created a Christmas Cookie Cutter Tags and Matching Gift Box!  

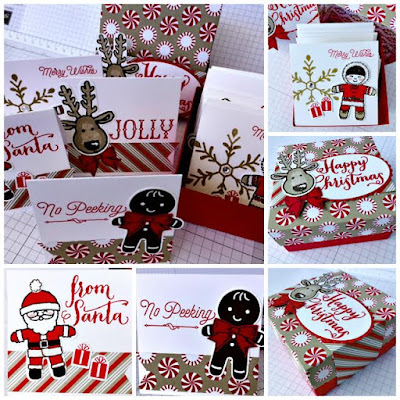
Your holiday presents will stand out from the crowd with these charming tags!  You’ll have fun creating this set of 12 (three each of four different designs) gift tags and the matching lidded box.  The set is created in traditional colors for easy co-ordination and the tags are a generous 3” x 3” size for adding your personal message.  Use the tags and box separately for your gifts or give the entire set to a special friend!


You can purchase a beautiful photo tutorial for this project and nine others from the month of November from Craft Project Central.

Don't forget to leave a comment on my November 10th Craft Project Central post for the chance to win a FREE month of tutorials!

Thanks for stopping - make it a great day!

Sue

November 17, 2016

Fall Pumpkins - Throw Back Thursday

Hi all,

I took the day off of work yesterday to use my PTO before the end of the year. The day was filled with lots of errands and tasks.

One of my stamping groups has a random acts of kindness challenge going. Today I gave this card to an employee of a business I visited. Karen is always so very responsive whenever I call; she's a real sweetheart.


This is one of the first Stampin' Up! stamp sets I ever purchased and I still enjoying pulling it out in the fall.

Even though this stamp set is no longer available, use the layout with one of your favorite stamp sets!

I'm looking forward to the weekend. My niece and three munchkins are coming for a weekend visit. Lots of hugs and kisses for me! Hope you have something that brings a smile to your face this weekend.

Until next time, take gentle care,

Sue

November 16, 2016

Forget Me Not Perpetual Calendar & Cards

Meg Holland is today's featured designer on Craft Project Central.

Forget Me Not Perpetual Calendar and Cards! 

How often do you forget the important events in your life?  One solution for you is to use this lovely Perpetual Birthday + Love, Happiness and Life Calendar, using the Hello Lovely Project Life Collection by Stampin’ Up!.  Each month is designed to document not just birthdays, but other happy events you want to remember.  Also included in this tutorial are designs for 12 greeting cards stored in the Project Life Envelope Pages in the back of the calendar.  This would also make a great gift for someone special!


The tutorial for this project and for all of the other Craft Central Projects featured on my blog this month are availalbe on the Craft Project Central site.

I hope you're enjoying all of the great sneak peaks this month!

Until next time, take gentle care,


November 13, 2016

'This Christmas' Trees & Treats Decor


‘This Christmas’ Trees & Treats Decor!  

Get ready for the holidays with this Festive Holiday Table Décor! You’ll learn how to make a Paper Cone Tree (and save money not having to buy that paper mache base that you get at the craft store!). You’ll also get the quick and easy measurements to turn simple pieces of Designer Series Paper into the perfect layers to quickly transform your Paper Cones to Christmas trees! Plus you will learn how to coordinate the Tagged Clear Tiny Treat Boxes into the theme of the Christmas décor as you add these simple, but elegant tags to them. And if you want to make this whole ensemble a gift to someone special, the coordinating card is the perfect complement!


Julie Beltramo is the creator of this holiday decor piece. For a step by step tutorial from Julie, head over to Craft Project Central and look for the November tutorial.

Happy stamping!


November 11, 2016

Dragonfly Dreams Sneak Peak!

Hi all!

I mentioned earlier this week that I spent last Saturday at a fabulous Stampin' Up! event in Madison, WI. Other than informative learning sessions, seeing long time friends and meeting new ones, receiving the 2017 Occasions Catalog was a highlight of the day. An even BIGGER thrill, was being able to come home with several new products!

In my first look through the catalog, the one item that truly made me squeal was the Watercolor Pencils!! Twelve Stampin' Up! colors that perfectly coordinate with our color families.


I was SO excited to see them, then we got to play with them! Before leaving for the day, we were told that the shoebox filled with supplies and the 4 stamp sets that were used for the day's make 'n takes could be shared by everyone at the table! We took turns choosing the items we wanted. My table mates were extremely gracious and allowed me to take the Watercolor Pencils. Woo Hoo! I couldn't wait to get home and play. I was also able to take home one of the stamp sets that caught my eye, Dragonfly Dreams. This is a two step stamp set; I used just one step so I could feature the Watercolor Pencils. AND this stamp set has coordinating Thinlits which are on my pre-order - I am looking forward to receiving that package! I used my favorite products from the upcoming Occasions Catalog for today's sneak peek!


Do you love it??? I do! The Watercolor Pencils were so much fun to work with. I used a Blender Pen to move the color. They are a bit addicting - you'll be seeing more samples using them.


The colors I used - Pacific Point, Old Olive, Soft Sky and Daffodil Delight.

The Occasions Catalog will go live on January 4th along with the Sale-A-Bration (SAB) catalog. For each $50 spent, you may choose one item for FREE from the SAB catalog. To receive a copy of these catalogs, leave a comment below and I'll be sure to get them in the mail to you prior to the first of the year.

I hope you enjoyed today's sneak peek. Stay tuned for more in the coming weeks. Don't miss a post - enter your email address in the field in the right column and my posts will be delivered right to your mailbox.

Until next time - happy stamping!

Sue

November 10, 2016

Delightful Holiday Gift Set

Greetings all!

Well, today is the day to feature MY project on Craft Project Central. I'm excited to share a sneak peak of my creation with you!

Delightful Holiday Gift Set! 

When invited to a gathering, it’s always nice to take a small gift for the host. This tutorial will walk you through the steps to create a divided hinged box that holds two holiday containers filled with holiday goodies, such as a yummy dip. What better way to complement a dip than a bottle of wine and some crackers. This festive package is a snap to put together. Any recipient would be delighted to receive this wonderful gift!


You had to figure I'd break out the Pretty Pine Thinlits for my project as they coordinate with my logo! My tutorial and ten others are available at Craft Project Central.

Would you like the opportunity to get ALL of the November tutorials for FREE? Head over to Craft Project Central and leave a comment on the post for my project before November 22nd and I'll randomly choose the author of one comment who will receive a FREE one month subscription to Craft Project Central. The winner will be posted on my blog.

I look forward to reading your comments. Thanks for stopping!


November 9, 2016

Anything But A Card Blog Hop


Welcome to the Pals Blog Hop for November 2016. We are thankful you stopped by to take a look at our new 2016 Blog Hop monthly themes.  This month our projects feature items that are considered 3D, Home Décor or Gift Sets. We hope to provide you with lots of ideas and that you enjoy our creations.
You may just be starting the Blog Hop or may have come from the previous link from the Line-up on the Pals Blog Hop listing shown below.  The full lineup will help you move along from blog to blog so you may see all the projects.
Looking for a quick gift or Thanksgiving place setting? Look no further than our 3x3 Clear Tiny Treat Boxes. There are 16 boxes in each package for a great price of $7.50.
Monday night I met with my HR tribe of women. We gather monthly at a local restaurant and have three hours or so of catching up. We've been stuck on Maggiano's Italian restaurant based on the fact that they don't seem to be bothered by our extended stays!  I like to take a treat for each of them and this is what they each received this month.

The pumpkin was created using Thoughtful Branches. The stem of the pumpkin is the tree trunk. To give a bit of dimension to the pumpkin, I used one of the stamps from Gorgeous Grunge to add flecks using Pumpkin Pie Craft Ink and then added some splatters of Gold Wink of Stella.

The box contains two Harvest Yankee Tea Lights; they smell heavenly! I love the spicy scents of fall candles. To center the pumpkins onto the box, I layed the pumpkins onto a 3" x 3" section of grid paper and set the clear box onto the pumpkin. This process made it easy to align the pumpkins. Be sure to orient your treat box so the opening is on the side, making it easy to remove the treat inside.


I used vintage Delightful Dijon Lace Ribbon to top off the box.


Not a fan of candles? Fill the box with chocolates, nuts, EOS lip balm or other small treats.


Don't have this die? You can create pumpkins using 3 ovals. The stem could be cut free hand and the 'bark' drawn onto the stem with a marker. There are many options in stamping - make projects your own!!

Thanks for visiting. To continue with the hop, click here to visit my friend Amy at Craft Carnivore or please refer to the Blog Hop Line-up below. We hope to see you on next month’s Pals Blog Hop! 


Blog Hop Line-up:  

  1. Sue Becker at RnR Stamping - You are here!!


November 8, 2016

Mixed Media Canvas & Pencil/Tool Holder

Here's another great project from Craft Project Central!


Mixed Media Canvas & Pencil/Tool Holder! 

Make this unique Mixed Media Canvas as a one of a kind special gift. It is the perfect art piece to be displayed on the wall or on the desk. Learn different Mixed Media techniques that will be useful for card making or other paper crafting projects. Learn how versatile your paper crafting supplies can be. As an extra bonus, make a coordinating Mixed Media Pencil/Tool Holder out of a tin can. This will dress up anyone’s desk and will be a conversation piece for sure. Change the color to match your home decor or the season. 

The tutorial for project, created by Monika Davis is available at Craft Project Central

Thanks for stopping. Make it a great day!


November 7, 2016

Sunshine Wishes - CPC25


Hi all,

The continued 60 degree weather here is Wisconsin was only topped Saturday by a day with friends, learning, stamping and getting to see the 2017 Occasions and Sale-A-Bration catalogs at OnStage in Madison! The event is sponsored by Stampin' Up! for demonstrators with events held simultaneously all over the world. Oh what fun! Stay tuned for sneak peaks of new products!


Today's project is based on Craft Project Central's sketch for this month. Sketches are a great way to stretch your stamping skills. Julie created this sketch and would love for you to play along! 


I finally broke out my Sunshine Wishes Thinlits for this project. So many stamping toys, so little time!


I used Fruit Stand Designer Series Paper on a Peekaboo Peach card base. The 3/8" Ruched Peekaboo Peach Ribbon separates the two DSP designs. 

The 'For You" sentiment is from Thoughtful Branches. I used the Layering Circle Framelits to create this piece and added a few Rhinestone Basic Jewels for a bit of sparkle.

To give the die a little pop, I cut and layered three pieces in Peekaboo Peach, Daffodil Delight and Tangerine Tango.


Please leave a comment and let me know what you think of this project. I have lots of fun ideas to share this week, be sure to stop back. Better yet - don't miss a post! Provide your email address in the field in the right column and my posts will be delivered right to your mailbox.

Make it a good day!